Hey y’all!
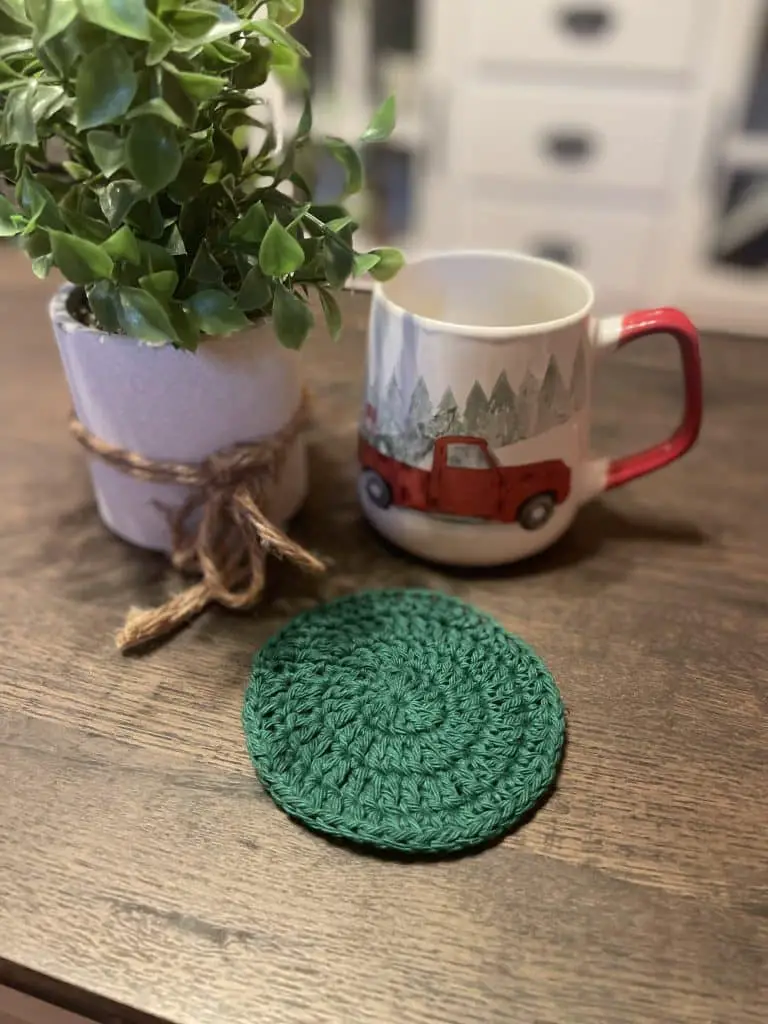
I wanted to go over an important crochet and amigurumi technique: how to crochet a flat circle for beginners. We’ll go over the techniques and pattern step-by-step. I will be creating a crochet coaster using my free coaster pattern. The downloadable PDF of the double crochet coaster is available on my Etsy. And if you need any help getting started with amigurumi or crocheting, I have an article on the ultimate guide to amigurumi that goes over different yarn types and weights and how to do the basic stitches.
If you have any questions, feel free to contact me on one of my socials.
Or you can email me at [email protected]. I’d love to see pictures when you make one! Enjoy 🙂
Disclosure: This post may contain affiliate links and I may receive a commission if you purchase through them, at no extra cost to you.
Tools and materials you need to make a crochet coaster:
Why use cotton yarn for a crochet coaster?
- Absorbency: Cotton yarn is great for absorbing moisture. So if you set a cold drink on a cotton coaster, it’ll absorb any sweat from it. And if you happen to spill anything on it, that will be absorbed as well.
- Durability: Since coasters are frequently used, they need to be durable. Cotton yarn is great for this as it’s very durable and can withstand daily use.
- Heat Resistance: Keeping hot drinks from burning your furniture is an important function for a coaster. Cotton yarn can withstand the heat from beverages without melting. This makes it a great choice.
- Easy to Clean: Most cotton yarn is able to be put in the washing machine on the gentle cycle. This makes it much easier to clean than other yarns that would have to be hand-washed.
- Variety: There are many different textures and colors available for cotton yarn. Some are super soft. Some are coarse. Some are solid colors. Some are multicolored. This allows you to create coasters that match your personal style and home decor.
- Environmentally Friendly: Cotton is a natural plant-based fiber, making it biodegradable and more environmentally friendly than synthetic alternatives.
- Minimal Stretching: Cotton yarn has minimal stretching compared to some other fibers. This helps the coaster maintain its shape and size over time.
These are the basic characteristics of cotton yarn. However, always check the label of the specific cotton yarn that you buy to make sure there aren’t any specific instructions.
Terminology (US):
SC – single crochet
MR – magic ring
INC – increase
DEC – decrease
R – round
HDC – half double crochet
DC – double crochet
TR – treble
CH – chain
Difficulty: Easy
Stitches Used:
Pattern Notes:
- This pattern will go step-by-step on how to crochet a flat circle. I’ll be making a basic round coaster, but you can stop at whatever size you want if you’re just doing this for practice.
- This pattern is crocheted in rounds. Once you make it back to the stitch marker that you placed in the last stitch of the previous round, that round is complete.
- You can make this circle bigger by adding 1 to the single crochet count (SC x ____, inc) x 6 each additional round. This will add 6 to the stitch count each additional round.
- This is the same for the double crochet circle. The increase (inc) for this circle will be 2 double crochets in a single stitch. So you can make this circle bigger by adding 1 to the double crochet count (DC x ____, DC inc) x 6 each additional round. This will add 6 to the stitch count each additional round.
- The downloadable PDF of the double crochet coaster is available on my Etsy.
Single-Crochet Free Coaster Pattern (Beginner Friendly):
Total time: ~30 minutes
R1: MR 6, sl st into first stitch – (crochet 6 stitches into a magic ring, then slip stitch into the first stitch you made.)
R2: inc x 6 (12) – (increase in all 6 stitches. By the end of the round, you will have 12 stitches in your circle.)
R3: (SC, inc) x 6 (18) – (alternate between single crochets and increases. You will do this six times, leaving you with 18 stitches at the end of the round.)
R4: (SC x 2, inc) x 6 (24) – (do two single crochets and then increase. You will do this combination 6 times, which will bring you to the end of the round with 24 stitches.)
R5: (SC x 3, inc) x 6 (30) – (do three single crochets and then increase. You will do this combination 6 times, which will bring you to the end of the round with 30 stitches.)
Continue until the coaster is as large as you want. (See notes on how to do this.)
Double-Crochet Free Coaster Pattern (Beginner Friendly):
Total time: ~15 minutes
R1: DC MR 12, sl st into first DC (12) – (create a magic ring and then make 12 double crochets into it. Slip stitch into first double crochet you made)
R2: CH 2, make 2 DC in each stitch. Sl st into first DC (24) – (Chain 2 and then make 2 double crochets in each stitch of the round. Continue until the end of the round. Slip stitch into the first double crochet you made.)
R3: CH 2, alternate b/w one DC in each stitch and 2 DC in each stitch. Sl st into first DC (36) – (Chain 2 and then alternate between 1 double crochet in each stitch and 2 double crochets in each stitch. Repeat until the end of the round. Slip stitch into the first double crochet you made.)
If you want to make a big circle, continue making double crochets but increase the number of stitches between the DC increase. If you want an average coaster, continue with the step below.
R4: CH 1, make 2 HDC in one stitch and then 1 HDC in the next 2 stitches. Sl st into first DC. (48) – (Chain 1 and then make 2 half double crochets in one stitch and 1 half double crochet in the next 2 stitches. Repeat until the end of the round. Slip stitch into the first double crochet you made.)

Suggested crochet tools:
- A crochet hook – I recommend a pack that comes with every size, but if you’re on a budget, you can just get the hook size that the pattern uses. I use this crochet hook pack from Amazon. I had to superglue a couple of the hooks to the handles after awhile, but it’s a cheap starting point and I like the feel of the handles.
- Stitch Markers – To me, these are essential. Without them, you’d have to be 100% accurate with your stitch counting each round to know where the round ends. But, luckily, my recommendation is super cheap. I use these stitch markers from Amazon. I’ve used them for a couple years with no complaints. They’re my favorite over others I’ve used.
- Safety Eyes (and maybe noses) – Probably 99% of amigurumi requires safety eyes. I use these from Amazon and it conveniently comes with a little case.
- Stuffing – Another amigurumi essential. I’d also say 99% of amigurumi requires stuffing. I buy this giant bag off of Amazon and I haven’t had to buy any for a few months. (I normally crochet smaller things, not big plushies, so take that as you will)
- Tapestry Needle – Needed to sew yarn in a lot of projects. I honestly can’t remember where I got the ones I use.
- Scissors – Needed for cutting the yarn. Any scissors will do. The best would probably be fabric scissors though. I got a pair from Joann Fabrics.
- Yarn – Use whatever yarn weight the pattern calls for. I tend to always use acrylic yarn. The cheapest I’ve found is Red Heart Super Saver Yarn. I love it and I don’t feel like I’m spending a fortune on yarn all the time.
- Crochet Ring (optional) – Not necessary, but if you wrap the yarn around the loop a couple times it keeps the tension nice and tight. Might be helpful if you’re a beginner and keep your hands from cramping up. I use these from Amazon.
OR
- All-in-One Crochet Pack – You can get this all-in-one crochet pack that has everything you need to get started.
More Free Crochet Patterns
Cactus Coaster Crochet Pattern
Mushroom Coaster Crochet Pattern
And that’s all folks!
Hope you enjoy these patterns. Let me know if you have any questions. And don’t forget to pin this post on Pinterest to save it for later!
Pattern Terms of Use:
This pattern is for personal use only. Do not redistribute. Any redistribution of this pattern is theft. You may sell the finished product. Credit AbiesCustomDesigns for the pattern and use your own photos. Tutorial videos or written instructions of this pattern are prohibited.
@Copyright AbiesCustomDesigns 2023 by Abigail Spencer
All Rights Reserved


